
我只是开始尝试做一个新的引导站点,并希望有搜索栏作为一个单独的折叠切换的一部分。基本上在navbar的右边,我想要搜索栏切换,然后菜单切换。
我有以下几个问题:
这是我目前所掌握的。我知道它几乎是默认的,但我才刚刚开始,对bootstrap还是个新手。
null
<script src="https://cdnjs.cloudflare.com/ajax/libs/jquery/3.3.1/jquery.min.js"></script>
<script src="https://stackpath.bootstrapcdn.com/bootstrap/4.5.2/js/bootstrap.min.js"></script>
<link href="https://stackpath.bootstrapcdn.com/bootstrap/4.5.2/css/bootstrap.min.css" rel="stylesheet"/>
<!DOCTYPE html>
<html lang="en">
<head>
<meta charset="utf-8">
<meta http-equiv="X-UA-Compatible" content="IE=edge">
<meta name="viewport" content="width=device-width, initial-scale=1">
<title>Bootstrap - Prebuilt Layout</title>
<!-- Bootstrap -->
<link href="css/bootstrap-4.4.1.css" rel="stylesheet">
</head>
<body>
<nav class="navbar navbar-expand-lg navbar-dark bg-dark">
<div class="container">
<a class="navbar-brand" href="#">Demo</a>
<button class="navbar-toggler" type="button" data-toggle="collapse" data-target="#navbarSearch" aria-controls="navbarSearch" aria-expanded="false" aria-label="Toggle navigation">
<span class="navbar-toggler-icon"></span>
</button>
<button class="navbar-toggler" type="button" data-toggle="collapse" data-target="#navbarContent" aria-controls="navbarContent" aria-expanded="false" aria-label="Toggle navigation">
<span class="navbar-toggler-icon"></span>
</button>
<div class="collapse navbar-collapse" id="navbarContent">
<ul class="navbar-nav mr-auto">
<li class="nav-item active">
<a class="nav-link" href="#">Home</a>
</li>
<li class="nav-item">
<a class="nav-link" href="#">Link</a>
</li>
<li class="nav-item dropdown">
<a class="nav-link dropdown-toggle" href="#" id="navbarDropdown" role="button" data-toggle="dropdown" aria-haspopup="true" aria-expanded="false">
Dropdown
</a>
<div class="dropdown-menu" aria-labelledby="navbarDropdown">
<a class="dropdown-item" href="#">Action</a>
<a class="dropdown-item" href="#">Another action</a>
<div class="dropdown-divider"></div>
<a class="dropdown-item" href="#">Something else here</a>
</div>
</li>
<li class="nav-item">
<a class="nav-link disabled" href="#">Disabled</a>
</li>
</ul>
</div>
<div class="collapse navbar-collapse" id="navbarSearch">
<form class="form-inline my-2 my-lg-0">
<input class="form-control mr-sm-2" type="search" placeholder="Search" aria-label="Search">
<button class="btn btn-outline-success my-2 my-sm-0" type="submit">Search</button>
</form>
</div>
</div>
</nav>
<div class="jumbotron jumbotron-fluid text-center">
<h1 class="display-4">Bootstrap with Dreamweaver</h1>
<p class="lead">Easily build your page using the Bootstrap components from the Insert panel.</p>
<hr class="my-4">
<p>This is a simple hero unit, a simple jumbotron-style component for calling extra attention to featured content or information.</p>
<p class="lead">
<a class="btn btn-primary btn-lg" href="#" role="button">Learn more</a>
</p>
</div>
<div class="container">
<div class="row text-center">
<div class="col-lg-6 offset-lg-3">Click outside the blue container to select this <strong>row</strong>. Columns are always contained within a row. <strong>Rows are indicated by a dashed grey line and rounded corners</strong>. </div>
</div>
<br>
<hr>
<br>
<div class="row">
<div class="col-md-4">
<div class="card">
<img class="card-img-top" src="images/card-img.png" alt="Card image cap">
<div class="card-body">
<h4 class="card-title">Card title</h4>
<p class="card-text">Some quick example text to build on the card title and make up the bulk of the card's content.</p>
<br><br>
<a href="#" class="btn btn-primary">Go somewhere</a>
</div>
</div>
</div>
<div class="col-md-4">
<div class="card">
<div class="card-body">
<h5 class="card-title">Card title</h5>
<h6 class="card-subtitle mb-2 text-muted">Card subtitle</h6>
<p class="card-text">Some quick example text to build on the card title and make up the bulk of the card's content.</p>
<a href="#" class="card-link">Card link</a>
<a href="#" class="card-link">Another link</a>
</div>
</div>
<br>
<br/>
<div class="card">
<div class="card-header">
Featured
</div>
<ul class="list-group list-group-flush">
<li class="list-group-item">Cras justo odio</li>
<li class="list-group-item">Dapibus ac facilisis in</li>
<li class="list-group-item">Vestibulum at eros</li>
</ul>
</div>
</div>
<div class="col-md-4">
<div class="card">
<img class="card-img-top" src="images/card-img.png" alt="Card image cap">
<div class="card-body">
<h5 class="card-title">Card title</h5>
<p class="card-text">Some text to build on the card's content.</p>
</div>
<ul class="list-group list-group-flush">
<li class="list-group-item">Cras justo odio</li>
<li class="list-group-item">Dapibus ac facilisis in</li>
</ul>
<div class="card-body">
<a href="#" class="card-link">Card link</a>
<a href="#" class="card-link">Another link</a>
</div>
</div>
</div>
</div>
<br/>
<br/>
<div class="row">
<div class=" col-md-4"> Click here to select this<strong> column.</strong> Always place your content within a column. Columns are indicated by a dashed blue line. </div>
<div class="col-md-4 "> You can <strong>resize a column</strong> using the handle on the right. Drag it to increase or reduce the number of columns.</div>
<div class="col-md-4 "> You can <strong>offset a column</strong> using the handle on the left. Drag it to increase or reduce the offset. </div>
</div>
<br/>
<br/>
<div class="row">
<div class="col-md-6 text-center">
<div class="card">
<div class="card-body">
<h3>Adding <strong>Buttons</strong></h3>
<p>Quickly add buttons to your page by using the button component in the insert panel. </p>
<button type="button" class="btn btn-info btn-md">Info Button</button>
<button type="button" class="btn btn-success btn-md">Success Button</button>
</div>
</div>
</div>
<div class="text-center col-md-6">
<div class="card">
<div class="card-body">
<h3>Adding <strong>Badges</strong></h3>
<p>Using the insert panel, add badge to your page by using the badge component.</p>
<span class="badge badge-info">Info Badge</span> <span class="badge badge-danger">Danger Badge</span>
</div>
</div>
</div>
</div>
<br>
<hr>
<div class="row">
<div class="text-center col-lg-6 offset-lg-3">
<h4>Footer </h4>
<p>Copyright © 2020 · All Rights Reserved · <a href="#" >My Website</a></p>
</div>
</div>
</div>
<!-- jQuery (necessary for Bootstrap's JavaScript plugins) -->
<script src="js/jquery-3.4.1.min.js"></script>
<!-- Include all compiled plugins (below), or include individual files as needed -->
<script src="js/popper.min.js"></script>
<script src="js/bootstrap-4.4.1.js"></script>
</body>
</html>null
1.:简单地将它们添加到一个单独的节点中。容器有一个flex-settings集,它将子节点对齐,以自动间距填充100%宽度。
为了克服这个问题,需要一个新的子节点或不同的flex-settings。
<div class="container">
  <a class="navbar-brand" href="#">Demo</a>
  <div>
    <a ...></a>
    <a ...></a>
  </div>
</div>
我前一段时间在这里提到过这种行为。
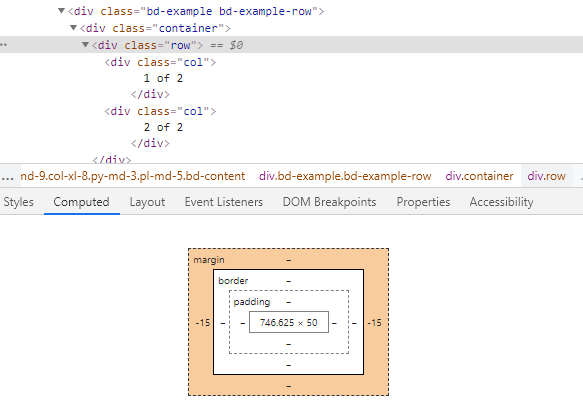
2.:class.container在左右两边增加了边距,是flex-container,它随断点的不同而变化。像.row这样的其他类会对此进行补偿,并使用负值来重新排列内容。

Bootstrap还提供了一些示例,这些示例将帮助您使用ML-AUTO在navbar中进行对齐。
3.:如果你想一次只打开一个,你应该把按钮和选项卡处理结合起来。手风琴的例子可能是正确的选择。最后,只要ID与它们必须显示的内容相匹配,按钮或链接放在哪里并不重要。