
我喜欢最大限度地控制屏幕,所以我必须控制每个像素,这有一些优点和缺点。一个缺点是我没有任何内置函数的帮助。所以我不知道如何画一条线。我试图制作一个函数来处理线条绘制,但我就是不能让它工作!这是我用来画线的代码
  int startX;
  int startY;
  int deltaX = x1/x2;
  int deltaY = y1/y2;
  float deltaPixl = deltaX/deltaY;
  for(int i=0;i<deltaY;i=i+1){
    if(x1>x2){ startX = x2;}else{ startX=x1;}
    if(y1>y2){ startY = y2;}else{ startY=y1;}
    pixl(startX+i,round(startY+(deltaPixl*i)),0);
  }
它使用了一个名为Pixl的函数,以便它可以轻松地将一个像素绘制到像素数组中,只是为了阐明为什么代码中有一个名为Pixl的函数。
当我尝试使用这段代码时,它不会崩溃,就像处理通常在出错时发生的那样!它就是不起作用,而是什么都不做!
在这个问题上我需要一些帮助。
你可以简单地使用PGraphics。这个想法是,一旦你有了一个PGraphics实例,你就可以使用点表示法来访问曾经使用过的绘图函数(只要它们在. becinDraw()和.endDraw()之间调用)。
使用noSmooth()你可以让它看起来像像素一样完美。
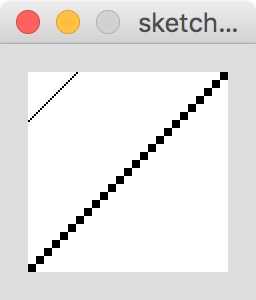
这里有一个基本的草图来说明这个想法:
// disable anti-aliasing
noSmooth();
// create a PGraphics layer
PGraphics layer = createGraphics(25, 25);
// render a line
layer.beginDraw();
layer.line(0, 24, 24, 0);
layer.endDraw();
// render the line at 100%
image(layer, 0, 0);
// render the line scaled up
image(layer, 0, 0, width, height);

这应该适用于大多数情况。(只有值和透明度非常小的更棘手的情况才会让你头疼)
如果出于某种原因你需要更多的控制,你可以总是实现你自己的光栅化方法。你可以从Bresenham的线算法开始
关于您的代码,有一些事情可能会出错:
浮点deltaPixl=deltaX/deltaY;:如果deltaY为零,您将遇到异常deltaX和deltaY进行整数除法(可能会使任一值都为0)println()语句,其中包含开始/结束值,以了解该循环是否会实际执行。此外,在for循环中,您可以println(i)查看是否得到您期望的值。总的来说,我建议查看Kevin Workman的如何调试指南。
此外,您可以使用lerp()来计算线的起点和终点之间的线性插值位置。传递每个坐标和一个标准化的值(在0.0,1.0之间),其中0.0=在起点,1.0=在终端,中间的任何东西都在线上(例如0.5=50%沿线)。
这是一个基本的例子:
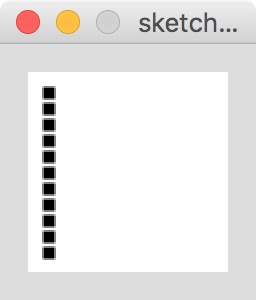
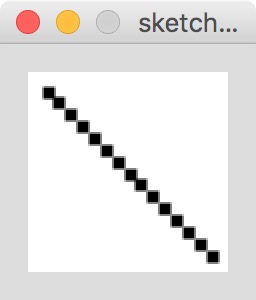
void drawLinePoints(int x1, int y1, int x2, int y2, int numberOfPoints){
    // for each point
    for(int i = 0; i < numberOfPoints; i++){
      // map the counter to a normalized (0.0 to 1.0) value for lerp
      // 0.0 = 0 % along the line, 0.5 = 50% along the line, 1.0 = 100% along the line
      float t = map(i, 0, numberOfPoints, 0.0, 1.0);
      // linearly interpolate between the start / end points (and snap to whole pixels (casting to integer type))
      int x = (int)lerp(x1, x2, t);
      int y = (int)lerp(y1, y2, t);
      // render the point
      point(x, y);
    }

}

void setup(){
  // render points are large squares
  strokeWeight(6);
  strokeCap(PROJECT);
}

void draw(){
  // clear frame
  background(255);
  // calculate distance
  float distance = dist(10, 10, mouseX, mouseY);
  // map distance the number of points to illustrate interpolation (more points = continuous line)
  int numPoints = (int)distance / 8;
  // render points along the line
  drawLinePoints(10, 10, mouseX, mouseY, numPoints);
}


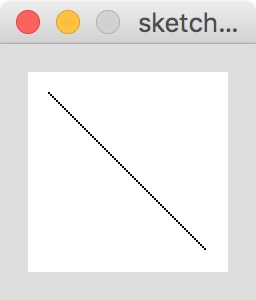
为了完整起见,这里是上面的片段,使用像素[]代替:
void drawLinePoints(int x1, int y1, int x2, int y2, int numberOfPoints){
    // for each point
    for(int i = 0; i < numberOfPoints; i++){
      // map the counter to a normalized (0.0 to 1.0) value for lerp
      // 0.0 = 0 % along the line, 0.5 = 50% along the line, 1.0 = 100% along the line
      float t = map(i, 0, numberOfPoints, 0.0, 1.0);
      // linearly interpolate between the start / end points (and snap to whole pixels (casting to integer type))
      int x = (int)lerp(x1, x2, t);
      int y = (int)lerp(y1, y2, t);
      // convert the x, y coordinate to pixels array index and render the point in black
      pixels[x + (y * width)] = color(0);
    }

}

void setup(){
  noSmooth();
}

void draw(){
  // clear frame
  loadPixels();
  java.util.Arrays.fill(pixels, color(255));
  // calculate distance
  float distance = dist(10, 10, mouseX, mouseY);
  // map distance the number of points to illustrate interpolation (more points = continuous line)
  int numPoints = (int)distance;
  // render points along the line
  drawLinePoints(10, 10, mouseX, mouseY, numPoints);
  // update pixels
  updatePixels();
}

我有点晚了,但是我在这个网站上找到了一个非常简单的画线到像素数组的方法。这是我在Monogame中做的一个简单实现(顺便说一句,对不起,它不使用处理——我从来没有用过它):
public void drawLine(int x1, int y1, int x2, int y2)
{
    //this will store the colour data of the canvas pixels
    Color[] canvasData = new Color[canvas.Width * canvas.Height];
    //store the pixel data of the canvas in canvasData
    canvas.GetData<Color>(canvasData);

    //drawing line starts here
    int dx = x2 - x1;
    int dy = y2 - y1;

    for (int x = x1; x < x2; x++)
    {
        int y = y1 + dy * (x - x1) / dx;
        //[y*canvas.Width+x] converts the 2d array index to a 1d array index
        canvasData[y * canvas.Width + x] = Color.Black;
    }
    //line drawing ended

    //setting the canvas' pixels to the modified pixels with the line
    canvas.SetData<Color>(canvasData);
}